
Overview
The Supabase integration offers two main features:- Auth Email Hook: Automatically send transactional emails for authentication events (signup, magic link, password recovery, etc.)
- Before User Created Hook: Sync newly created Supabase users to your Notifuse contact database
Configuration
Navigate to Notifuse workspace Settings → Integrations → Add Integration → Supabase.Prerequisites
Before configuring the Supabase integration:- A Notifuse workspace with appropriate permissions
- A Supabase project
- At least one email integration configured in Notifuse (for sending transactional emails)
Auth Email Hook
The Auth Email Hook allows you to send branded, customized authentication emails through Notifuse instead of the default Supabase emails.Setup
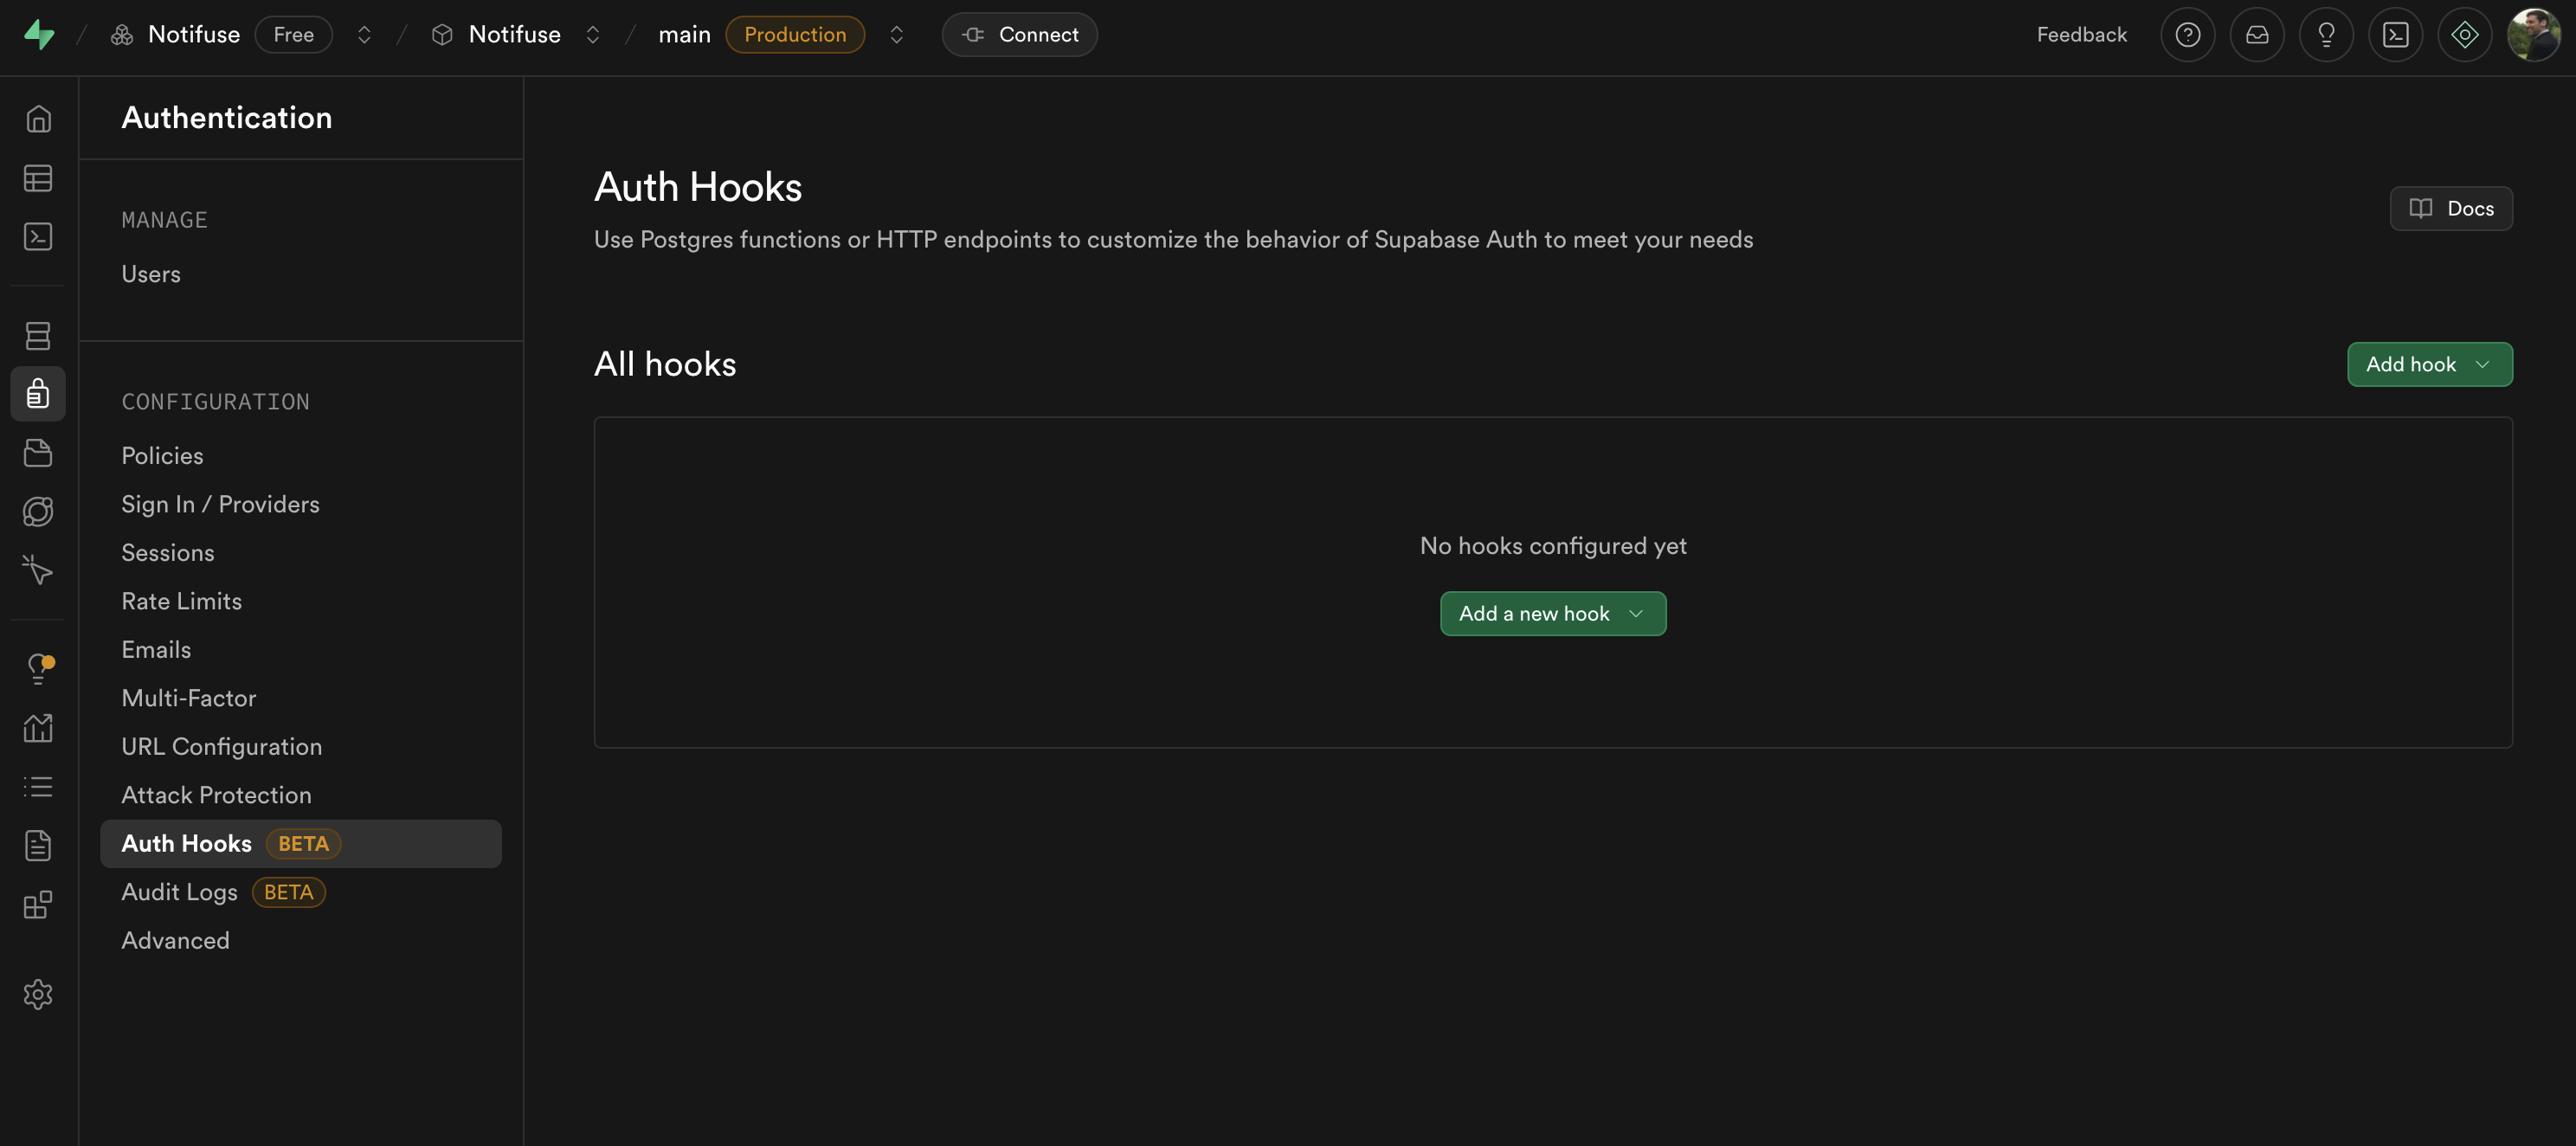
- Go to Supabase Auth Hooks in your Supabase Dashboard and open the Auth Email Hook settings
- Add new Hook
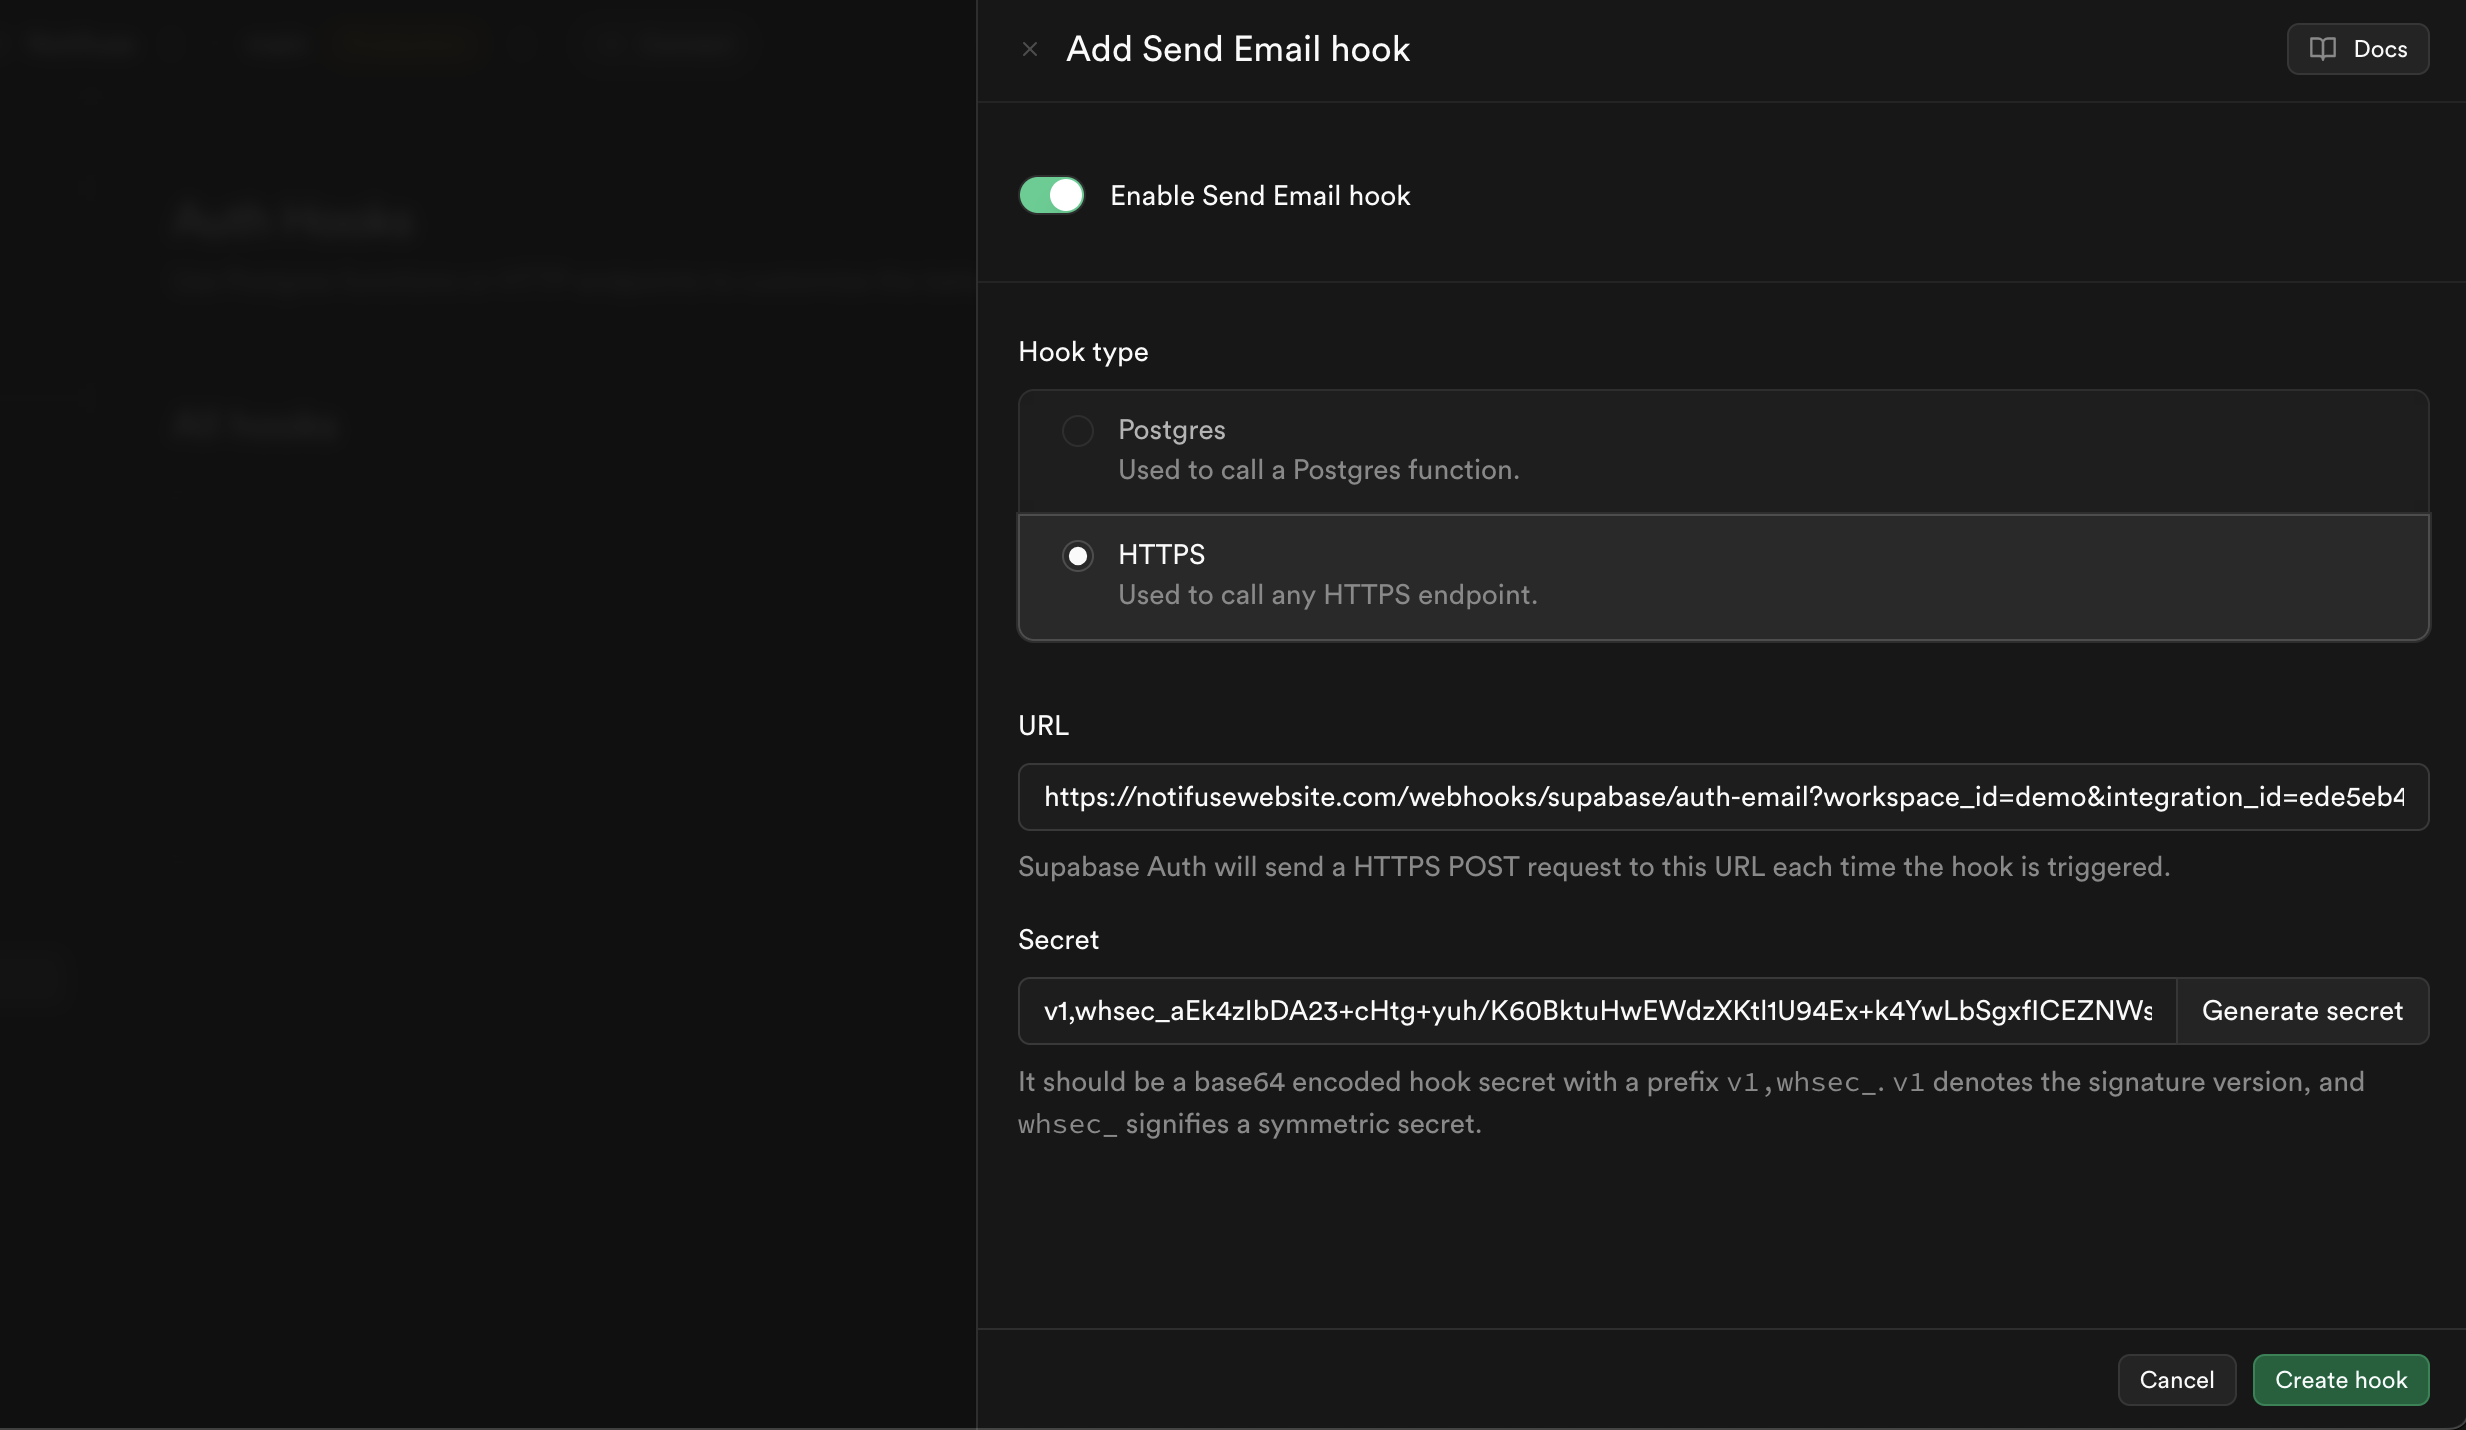
- Select “HTTPS” type
- Click “Generate a secret” and copy its value to the Notifuse integration
- Save the integration to see the webhook endpoint generated by Notifuse
- Copy and past the webhook endpoint value to your Supabase hook and save
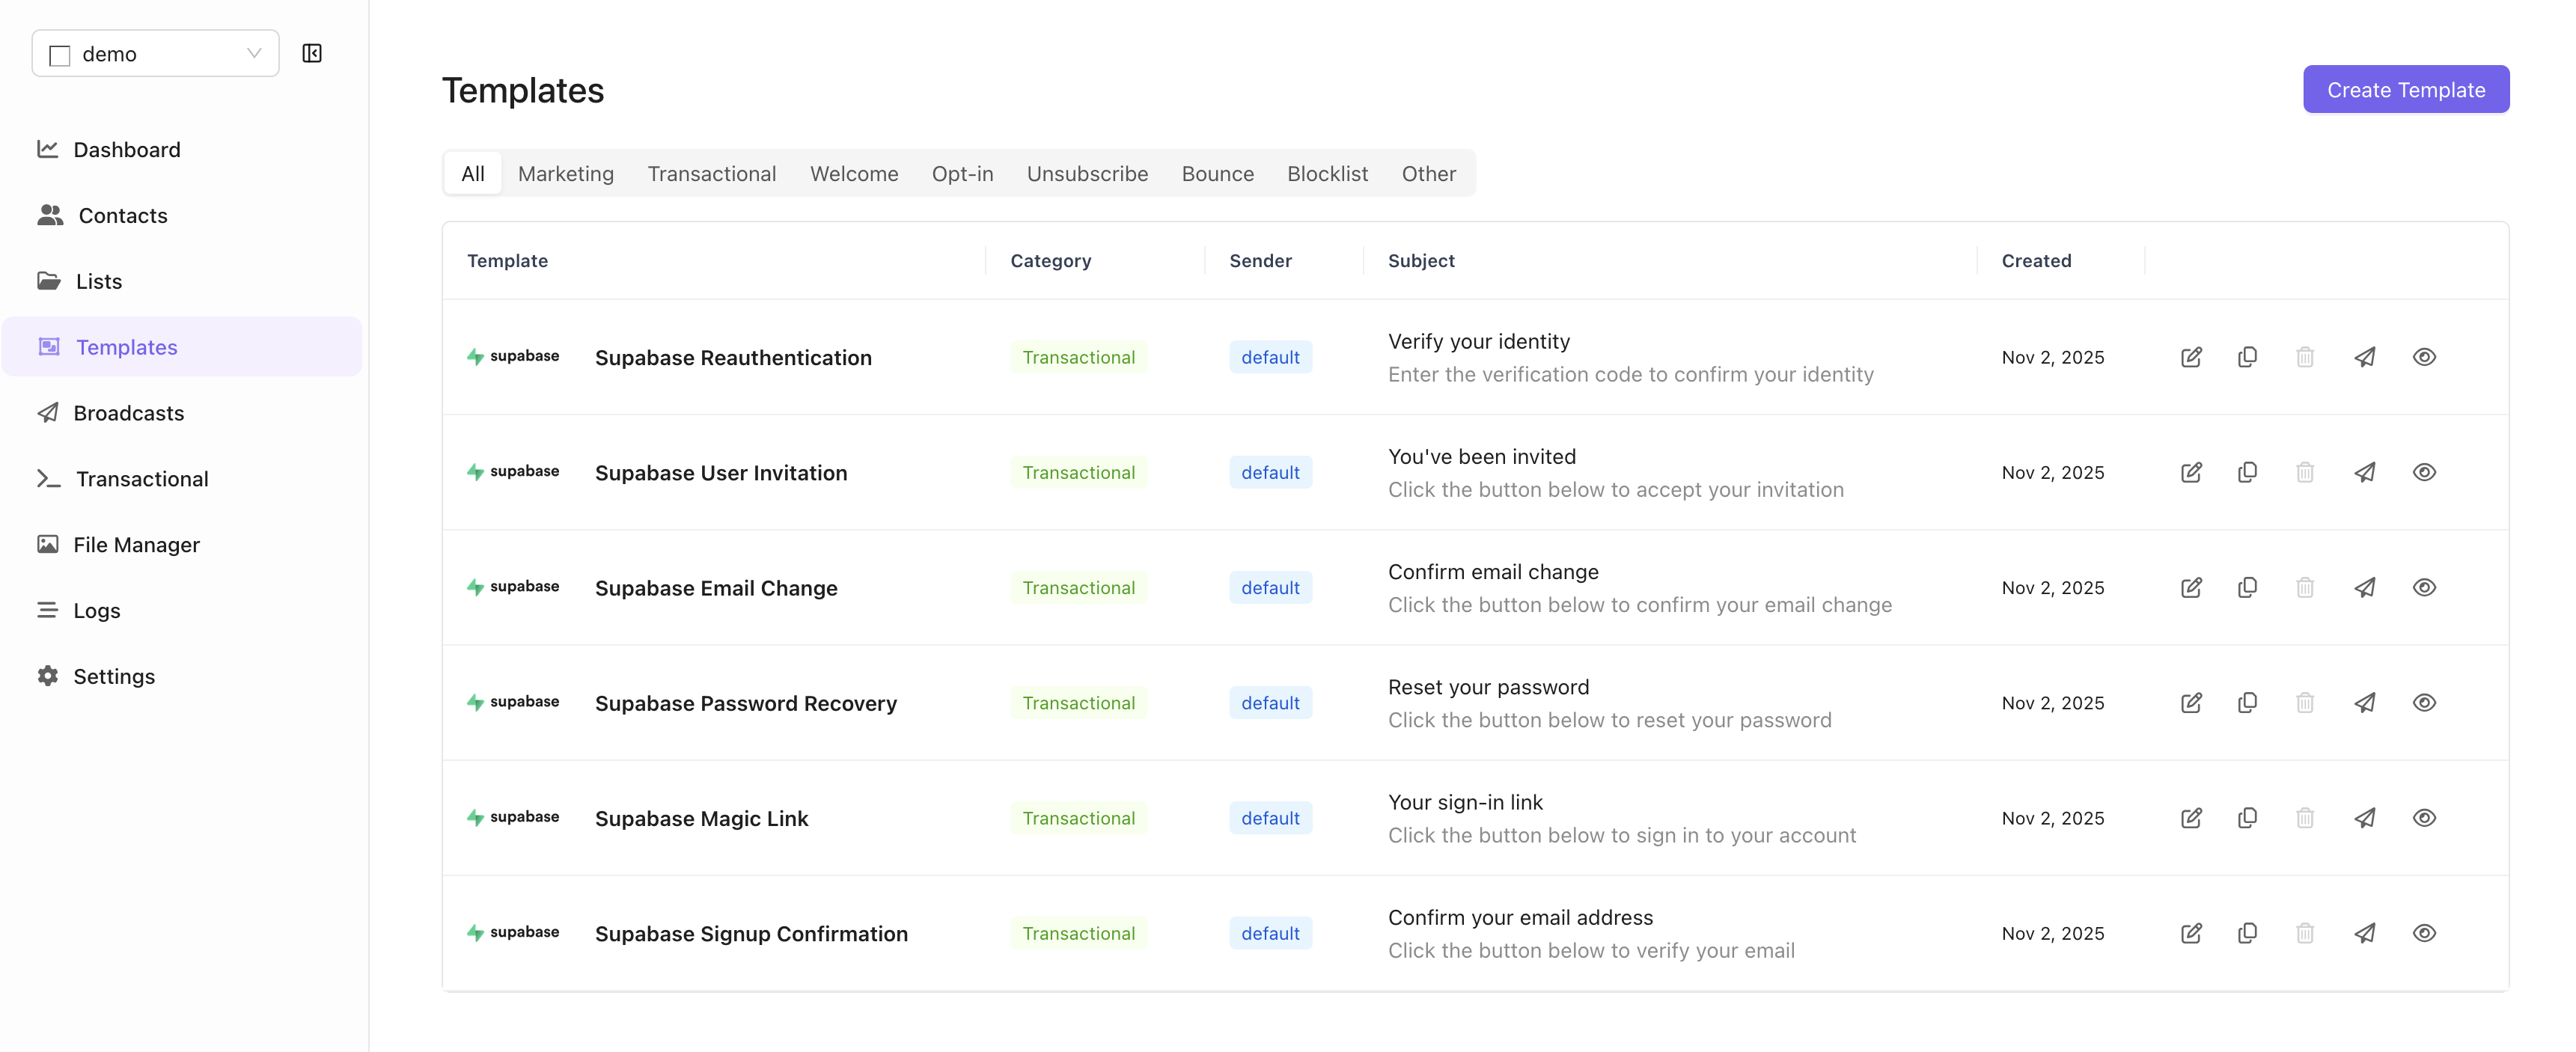
Default Templates
When you first save the Supabase integration, Notifuse will automatically create default templates for all email types. These templates:- Are marked as integration-managed (cannot be deleted)
- Include all necessary Liquid template variables from Supabase
- Can be customized to match your brand
Template Variables
All Supabase auth email templates have access to these variables:Confirmation URL Format
Important: All confirmation links must use this exact format to work with Supabase’s GoTrue auth system:token_hash for the URL, not token. The token variable is for displaying OTP codes in reauthentication emails.
Example Template
Here’s an example signup confirmation template with the correct URL format:Before User Created Hook
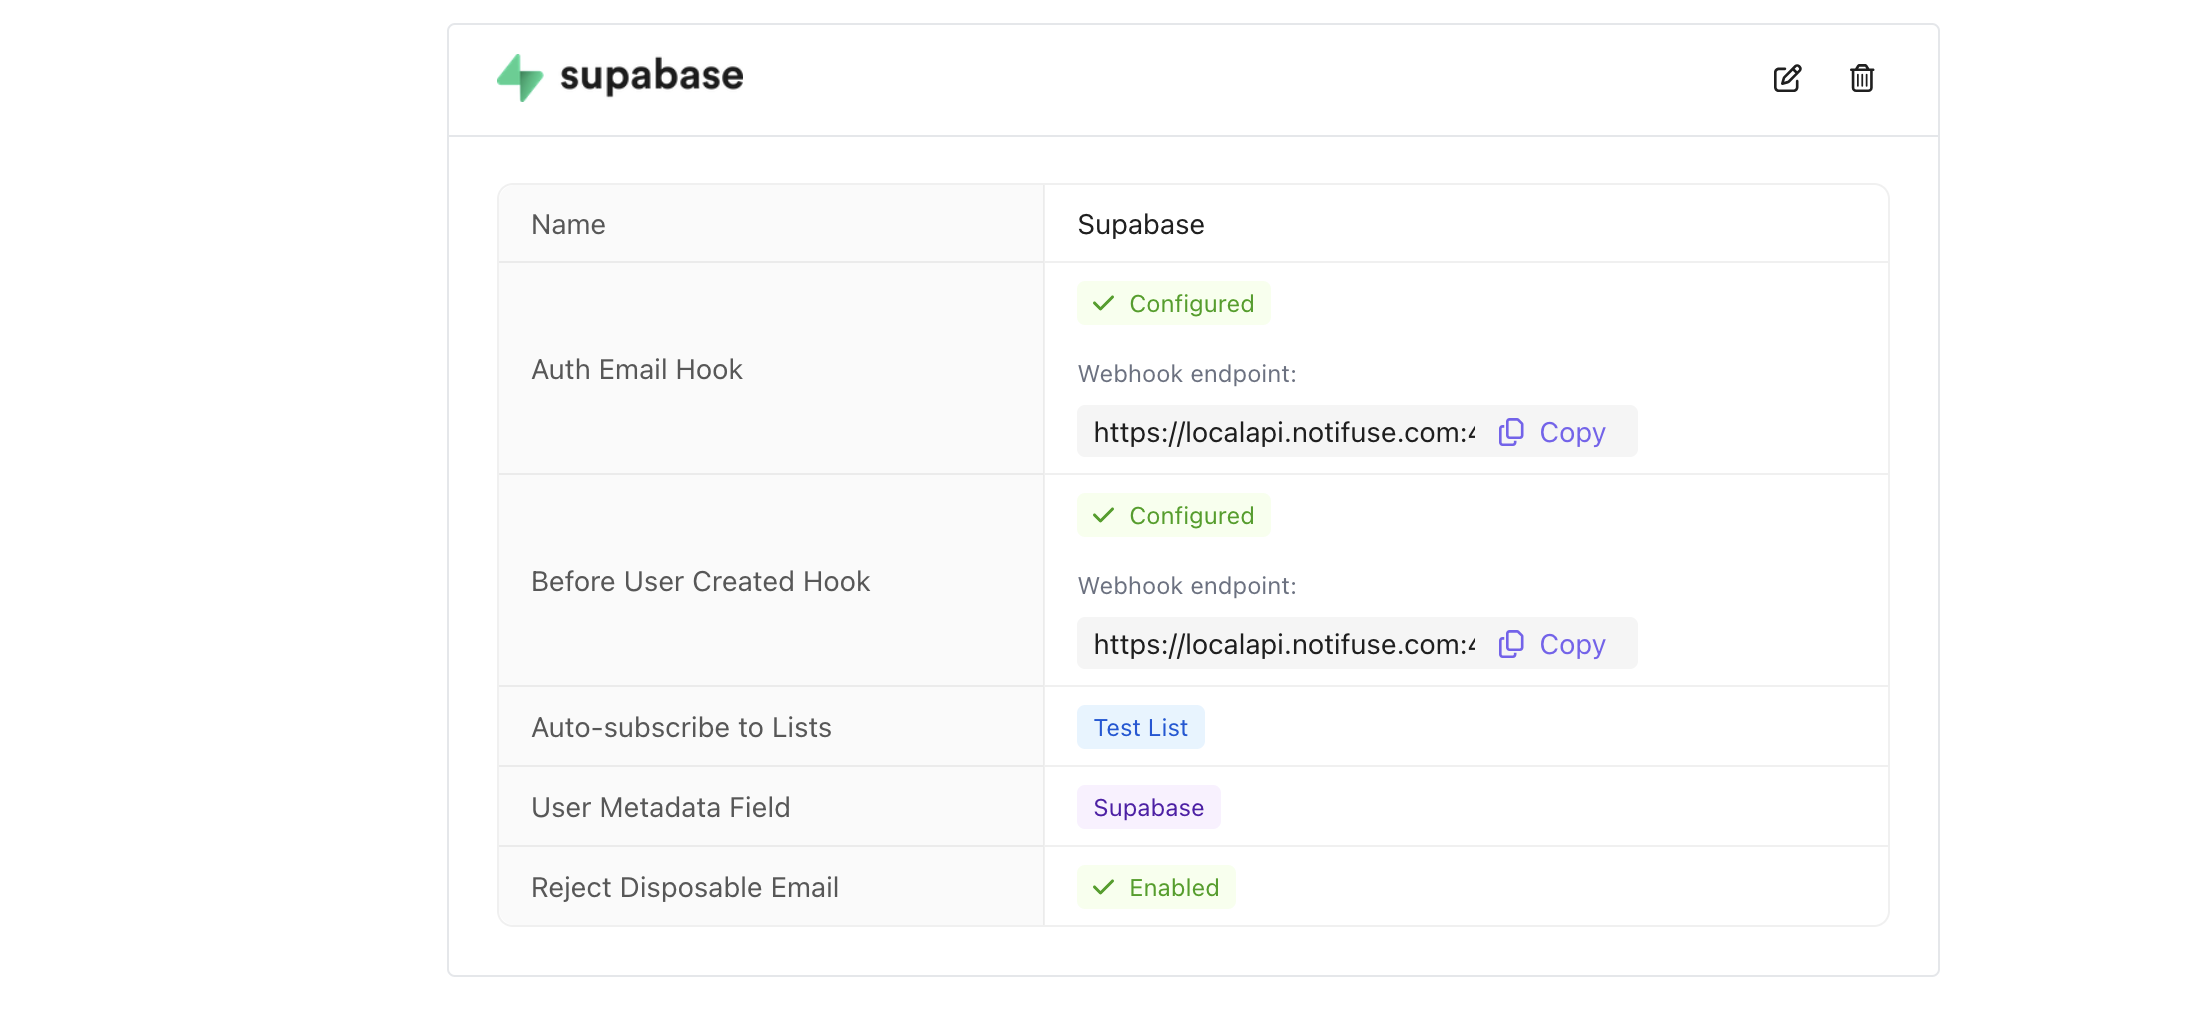
The Before User Created Hook automatically adds new Supabase users to your Notifuse contact database.Setup
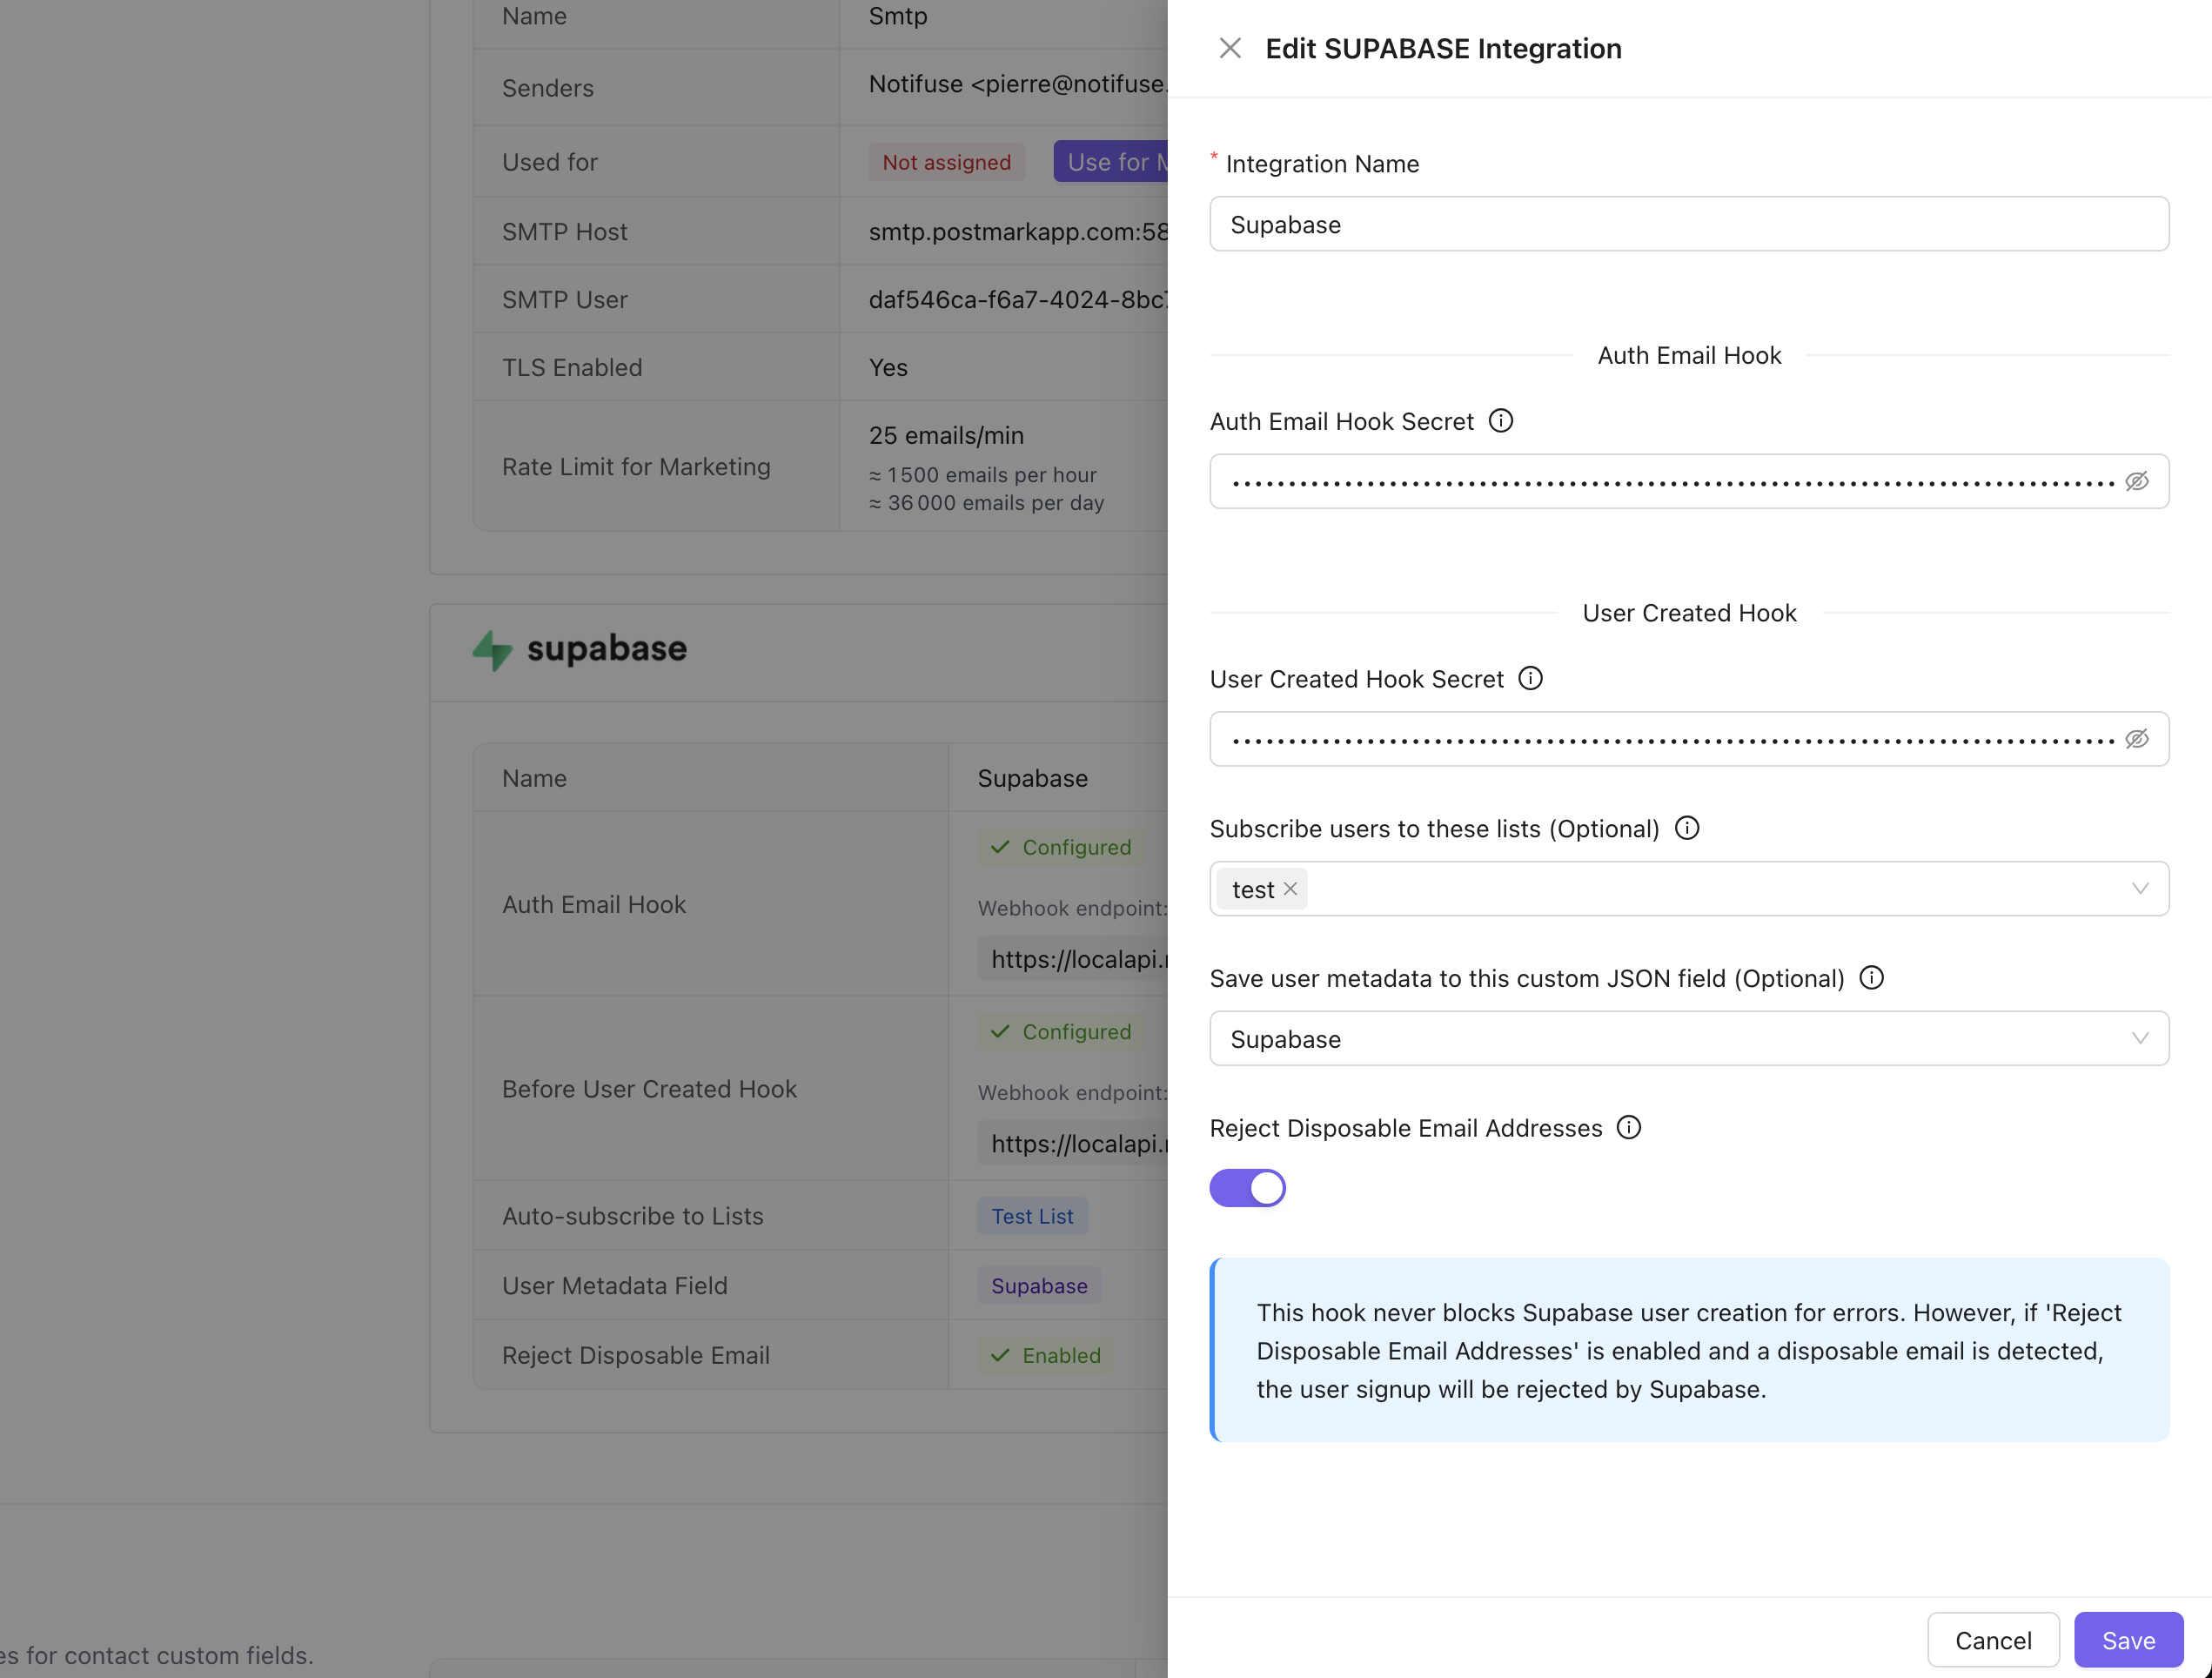
- Toggle on Before User Created Hook
- Generate a webhook secret key in Supabase (different from the auth email hook)
- Copy the secret key in the Notifuse Supabase integration form
- (Optional) Select a contact list to automatically add new users to
- (Optional) Reject disposable email addresses (e.g: @yopmail.com)
Field Mapping
Supabase user fields are automatically mapped to Notifuse contact fields:
You can optionally choose which Custom JSON field (1-5) will receive the Supabase
user_metadata in the integration settings. If no field is selected, the user_metadata will not be synced to Notifuse.
Error Handling
The Before User Created Hook is configured to be lenient:- If there’s an error upserting the contact, the error is logged but the signup proceeds
- If the configured contact list is deleted, the error is logged but the signup proceeds
- This ensures that Notifuse issues never prevent user signups in your application
Security
Webhook Signature Verification
All webhooks from Supabase are verified using HMAC-SHA256 signatures. Notifuse will reject any webhooks with invalid signatures, ensuring that only authentic requests from your Supabase project are processed.Encryption
Webhook signature keys are encrypted at rest in Notifuse’s database using AES-256 encryption.Testing
Test Auth Emails
- In your application, trigger an authentication flow (e.g., signup)
- Check your Notifuse logs to confirm the webhook was received
- Check the recipient’s inbox for the email
Test User Sync
- Create a new user in your Supabase project
- In Notifuse, navigate to Contacts
- Search for the user’s email to confirm they were added
- If you configured a target list, verify the user was added to that list
Troubleshooting
Emails Not Sending
Check these items:- Is the Auth Email Hook enabled in Notifuse?
- Is the webhook signature key correct in both Supabase and Notifuse?
- Do you have a transactional email provider configured in your workspace?
- Check the Notifuse logs for error messages
Users Not Syncing
Check these items:- Is the Before User Created Hook enabled in Notifuse?
- Is the webhook signature key correct in both Supabase and Notifuse?
- Check the Notifuse logs for error messages
- Remember: errors in the Before User Created Hook are logged but don’t prevent signups
Invalid Signature Errors
This usually means:- The signature key in Notifuse doesn’t match the one in Supabase
- The webhook URL includes the wrong
workspace_idorintegration_idparameters - You’re testing with a tool like Postman without the correct signature header
- Regenerate the signature key in Supabase
- Copy the new key to Notifuse
- Ensure you’re using the exact webhook URL provided by Notifuse
Email Change Behavior
Supabase has a special “secure email change” flow that sends two emails:- To the current email address: Uses
template_mappings.email_change_current- Available variables:
user.email,user.email_new,email_data.token_hash_new - Confirmation URL:
{{ email_data.site_url }}/verify?token={{ email_data.token_hash_new }}&type=email_change&redirect_to={{ email_data.redirect_to }}
- Available variables:
- To the new email address: Uses
template_mappings.email_change_new- Available variables:
user.email,user.email_new,email_data.token_hash - Confirmation URL:
{{ email_data.site_url }}/verify?token={{ email_data.token_hash }}&type=email_change&redirect_to={{ email_data.redirect_to }}
- Available variables:
token_hash_newis used for the current email addresstoken_hashis used for the new email address
Advanced Configuration
Custom Contact List Logic
If you need more sophisticated logic for which list to add users to (based on user metadata, for example), you can:- Leave the target list empty in the integration settings
- Use Notifuse’s segment feature to automatically organize users
- Create an automation that triggers when new contacts are added
Email Customization
All integration-managed templates can be edited to match your brand:- Customize colors, fonts, and layout
- Add your logo and brand assets
- Modify copy while preserving template variables
- Add UTM parameters for tracking
Limitations
- Integration-managed templates cannot be deleted (they can be edited)
- Each Supabase project requires its own integration in Notifuse
- The Before User Created Hook only fires for new user signups (not for existing users)
- Template variables are determined by Supabase and cannot be modified
Best Practices
- Test before going live: Set up the integration in a development workspace first
- Customize templates: The default templates are a starting point - customize them to match your brand
- Monitor logs: Check Notifuse logs regularly to ensure webhooks are being processed
- Use segments: Instead of static lists, use Notifuse segments to automatically organize users
- Keep keys secure: Treat webhook signature keys like passwords - never commit them to version control